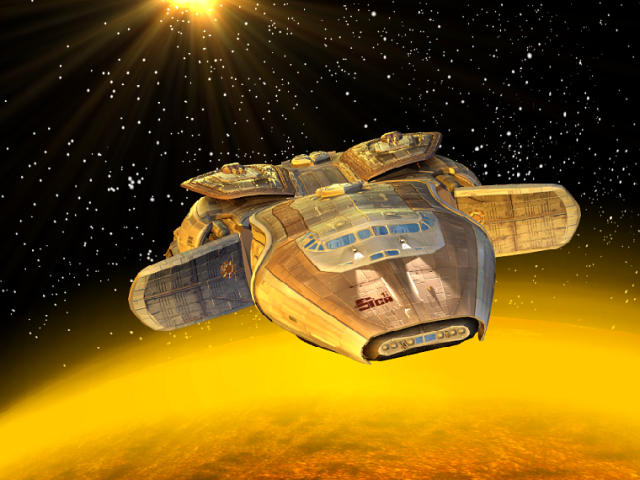
Finally, a video done!
See this thread: vi ... f=5&t=1751
Here's the link to the video:
http://vimeo.com/18104441.
What do you think?
Scarab Video
-
Peter
- Senior Chief Petty Officer
- Posts: 170
- Joined: 18 Apr 2010, 15:18
- Type the number ten into the box: 0
- Location: Texas
Scarab Video
a day without orange juice is like... a day without orange juice
-
ranger0101
- Master Chief Petty Officer
- Posts: 363
- Joined: 22 May 2009, 13:15
- Type the number ten into the box: 0
- Location: Orrville Ohio U.S.A.
Re: Scarab Video
Very Cool video Peter
Rely nice model too.. Animation in WorkSpace
realtime... Sweet
Any chance of a bit of a tutorial on how you
made this animation..
I understand the ship model was made in Wings 3D..
I would rely like a tutorial on the ships construction..
We could all learn a lot about Wings..
Great Job... Keep it up
Cheers!!!
ranger0101
Rely nice model too.. Animation in WorkSpace
realtime... Sweet
Any chance of a bit of a tutorial on how you
made this animation..
I understand the ship model was made in Wings 3D..
I would rely like a tutorial on the ships construction..
We could all learn a lot about Wings..
Great Job... Keep it up
Cheers!!!
ranger0101
In order to Create Art... You must first learn to See...
My Website http://www.theartoftimkoons.yolasite.com
-
bitkar
- Captain
- Posts: 2089
- Joined: 16 Mar 2010, 07:14
- Type the number ten into the box: 0
- Location: Czech Republic
Re: Scarab Video
i like the planets look. the ship is also a very nice model and it looks great for a realtime.
Michal aka bitkar
tS freak since tS2 (1998) and forever (tS7.61 modeler)
-
Steinie
- Captain
- Posts: 2958
- Joined: 21 May 2009, 17:38
- Type the number ten into the box: 10
Re: Scarab Video
Peter that is an excellent animation using real-time rendering!
-
Peter
- Senior Chief Petty Officer
- Posts: 170
- Joined: 18 Apr 2010, 15:18
- Type the number ten into the box: 0
- Location: Texas
Re: Scarab Video
Thanks everyone.
I have plans to take the video through entry to landing. There are deployable wings, landing gear, retro rockets, and other animation clips waiting to be used. I picked a desert planet to hopefully make surface modeling less complicated.
Though real-time, my actual frame rate is about 1 fps. Yet, retakes are not a nuisance. I get a rendered sequence done in a few minutes instead of overnight (as with traditional renderer packages). RTR is the future of animation IMHO. TrueSpace is ahead of it's time. I understand why Microsoft grabbed it!
The lens flare and smoke were layered in using ParticleIllusion - the best Magazine freebie I ever got!
I have some tips to share so I will make some tutorial-ish posts over time.
Happy holidays!
I have plans to take the video through entry to landing. There are deployable wings, landing gear, retro rockets, and other animation clips waiting to be used. I picked a desert planet to hopefully make surface modeling less complicated.
Though real-time, my actual frame rate is about 1 fps. Yet, retakes are not a nuisance. I get a rendered sequence done in a few minutes instead of overnight (as with traditional renderer packages). RTR is the future of animation IMHO. TrueSpace is ahead of it's time. I understand why Microsoft grabbed it!
The lens flare and smoke were layered in using ParticleIllusion - the best Magazine freebie I ever got!
I have some tips to share so I will make some tutorial-ish posts over time.
Happy holidays!
a day without orange juice is like... a day without orange juice
-
MikomDude
- Captain
- Posts: 1930
- Joined: 04 Oct 2010, 11:12
- Type the number ten into the box: 0
- Location: The Hague, Netherlands
Re: Scarab Video
Nice! 
-
Peter
- Senior Chief Petty Officer
- Posts: 170
- Joined: 18 Apr 2010, 15:18
- Type the number ten into the box: 0
- Location: Texas
Re: Scarab Video Tutorial 1
Wings 3d modeling:
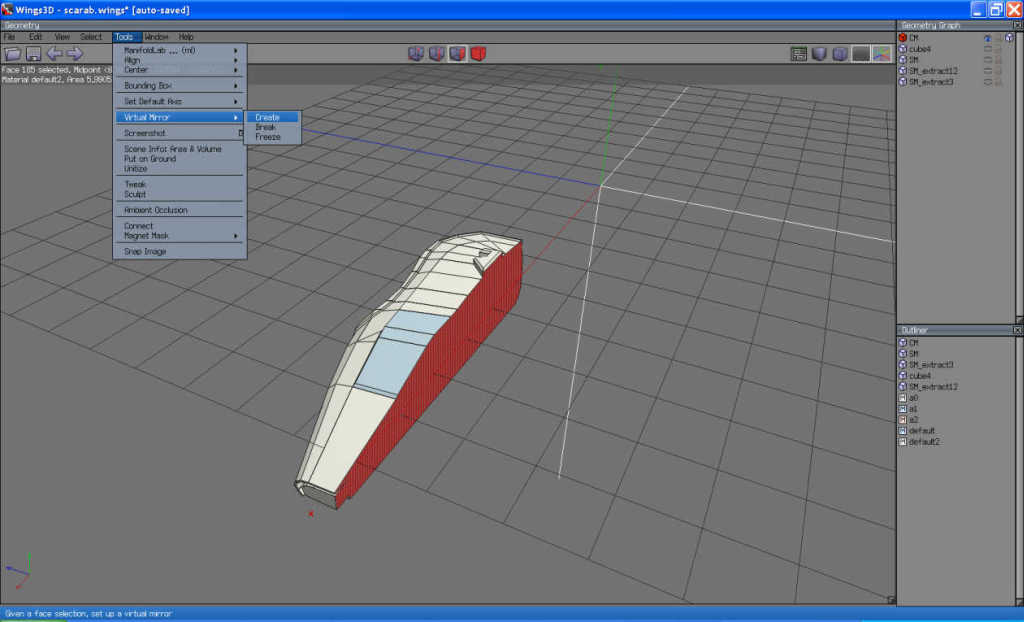
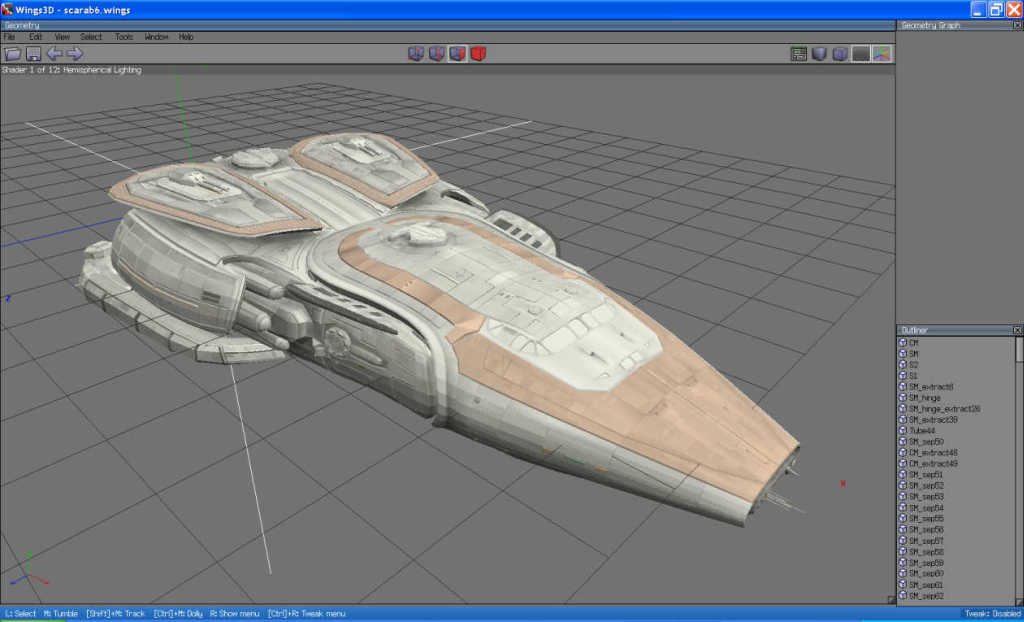
1) Here is the rough mesh of the whole ship. It was started from a single cube. The section in front of the green shaded one is all done and in the video. You can see this is a pretty big project. 2) I hid all but the front most section of the model. This was extruded from a single cube as I referred to my pencil sketch. I mirrored the section at the polygon in red. You can see the command I used in the drop down menu. 3) Here is the finished product with all the details and textures added. Continued...
a day without orange juice is like... a day without orange juice
-
Peter
- Senior Chief Petty Officer
- Posts: 170
- Joined: 18 Apr 2010, 15:18
- Type the number ten into the box: 0
- Location: Texas
Re: Scarab Video Tutorial 1 concluded
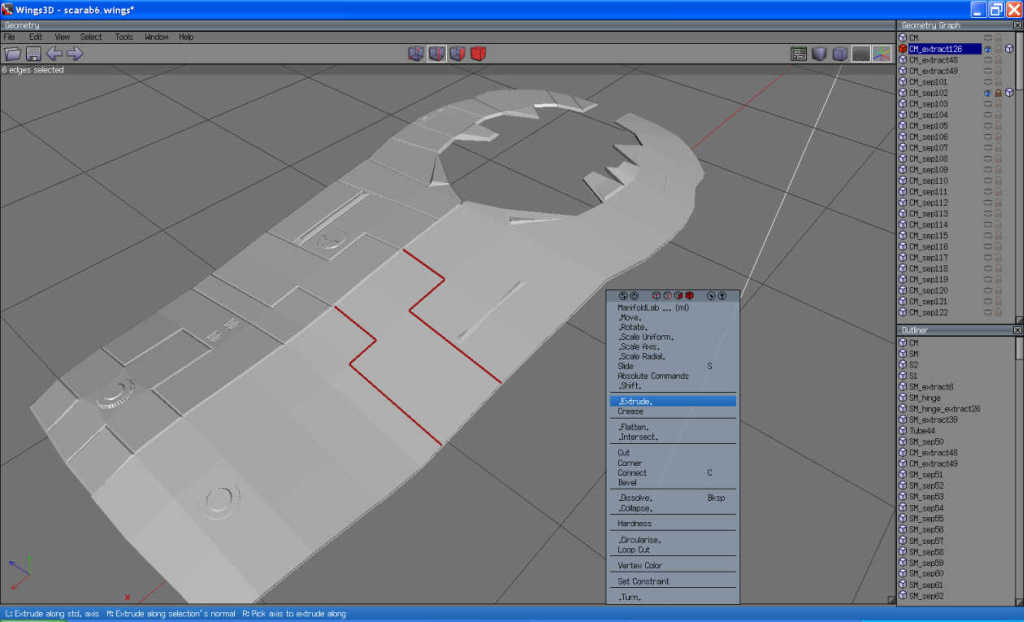
4) Here is how I added the details & greebles. The details are added to separate sections of the rough mesh. I settled on this so I could go back to the original mesh and redo a section completely from scratch if need be. The trick is that each section is a separate object. This picture shows the rough mesh object and just one of the sections visible in red.
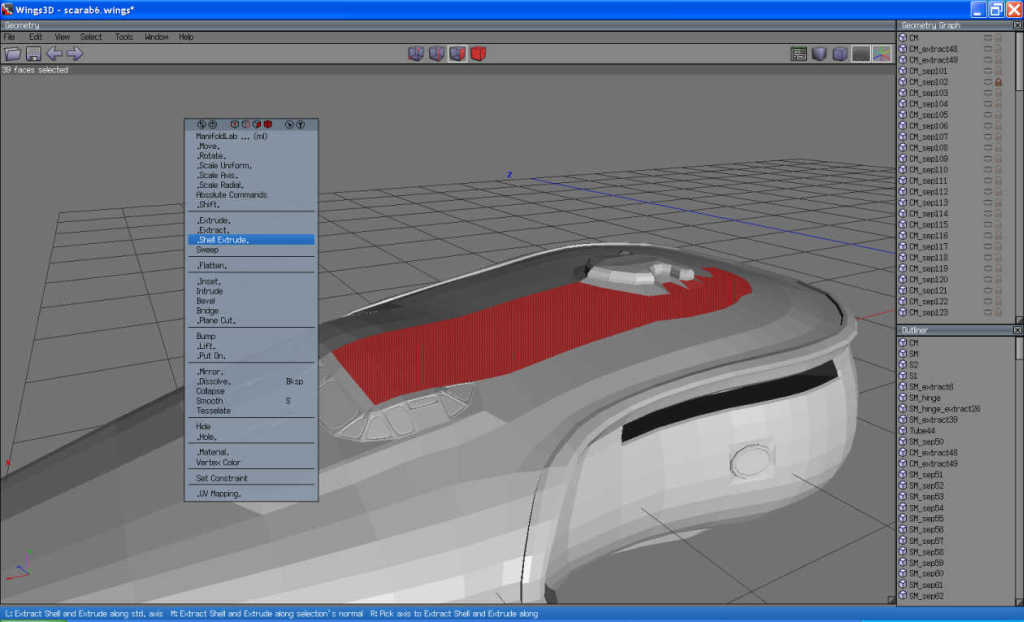
5) Here is how I made the section. With just the rough mesh visible now, I selected polygons comprising the section. Then I did shell extrude, normal, to duplicate them into a separate shell object.
6) On the left is a mirror of the original section completed earlier. On the right is the new section I just created. To add greebles, just select polygons or edges and extrude them a bit. Mirroring is done after all sections are created (making all the sections took months working nights after work). You can see some edges selected ready for extruding.
All the sections are like plates attached to the surface of the rough mesh. These sections could be used later to make normal map bitmaps applied to the rough mesh to make a "low poly" model. I didn't do this for the Scarab project, though. Questions? Glad to answer any. Bye for now.
a day without orange juice is like... a day without orange juice