Once again I feel the need to share my knowledge and try and give something back for all the efforts that other members have made on this forum.
This tutorial will be on character modeling.
While this is not specific to Poser and more so should be a general topic or general modeling topic.
What I want to show in this tutorial is how to create a complete character minus the rigging in just TS 4.3 and Argile.
So with that being said lets begin.
We are going to model a biped fat frog.
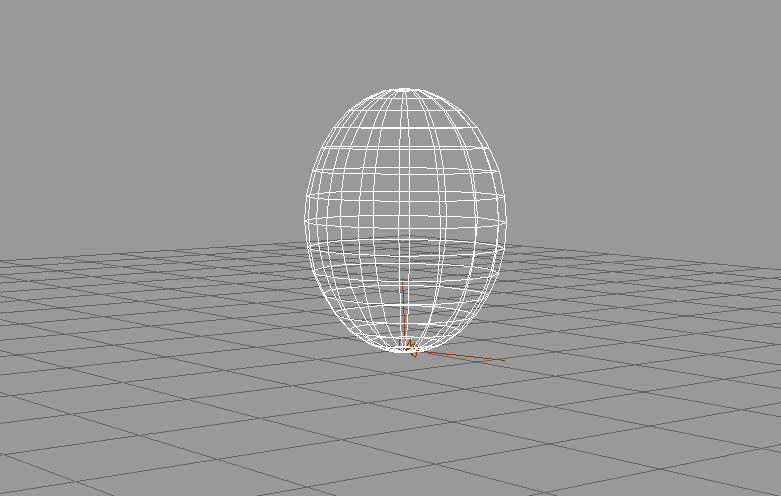
First we start out with a simple sphere in TS.
Character Modeling
-
jeffroig
- Chief Warrant Officer
- Posts: 662
- Joined: 22 May 2009, 10:49
- Type the number ten into the box: 0
Character Modeling
- Attachments
-
..
-
jeffroig
- Chief Warrant Officer
- Posts: 662
- Joined: 22 May 2009, 10:49
- Type the number ten into the box: 0
Re: Character Modeling
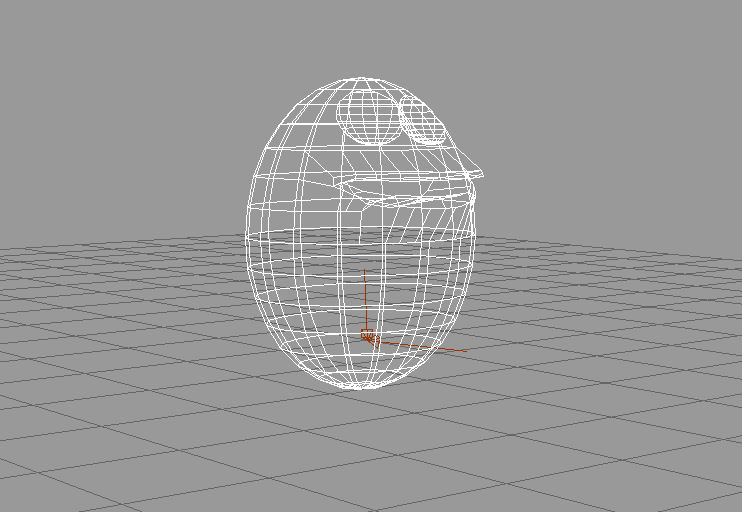
Next we are going to draw some polygons on the sphere as this is where the mouth will be and we are going to subtract a sphere from it for the eye sockets.
With a little careful pulling of the polygons for the mouth we have created what looks like a mouth and lips.
With a little careful pulling of the polygons for the mouth we have created what looks like a mouth and lips.
- Attachments
-
..
-
jeffroig
- Chief Warrant Officer
- Posts: 662
- Joined: 22 May 2009, 10:49
- Type the number ten into the box: 0
Re: Character Modeling
Next this object is exported out as a OBJ and imported into Argile.
In Argile I perform a subdivision to the model this allows me to begin sculpting and create more of the shape I am after.
Notice something here, all the polygons stay in a horizontal/vertical fashion. Why you may ask, well if you are planning to rigg your character you must always think ahead of each move you make.
You want your head to bend and go side to side without it causing and problems with other polygons in the neck or abdomen.
So as you model you want to keep this in mind or when you do rig your character you will end up with some wild and weird effects when bending the body parts.
In Argile I perform a subdivision to the model this allows me to begin sculpting and create more of the shape I am after.
Notice something here, all the polygons stay in a horizontal/vertical fashion. Why you may ask, well if you are planning to rigg your character you must always think ahead of each move you make.
You want your head to bend and go side to side without it causing and problems with other polygons in the neck or abdomen.
So as you model you want to keep this in mind or when you do rig your character you will end up with some wild and weird effects when bending the body parts.
- Attachments
-

..
-
jeffroig
- Chief Warrant Officer
- Posts: 662
- Joined: 22 May 2009, 10:49
- Type the number ten into the box: 0
Re: Character Modeling
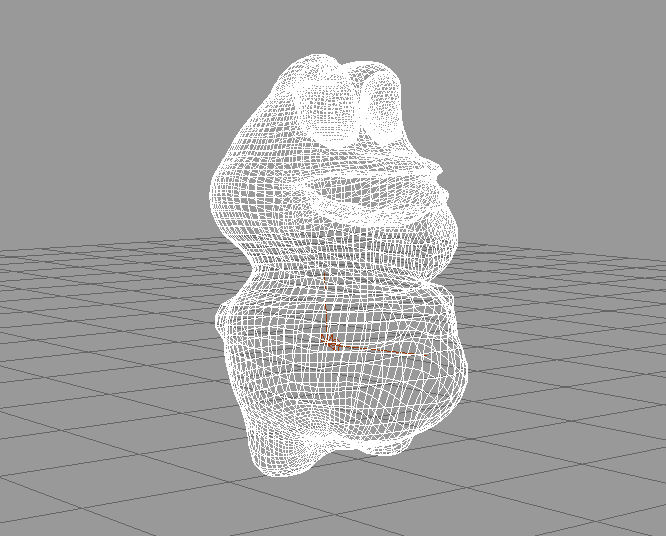
Next I subdivide once again so that I am able to add even more detail to the body.
I use the pull tool in Argile and the smoothing tool more than any other tool to get my desired effect.
The eyelids are raised and the mouth is pulled out more and the mouth socket is pushed in.
I also pull out on the areas where I plan to add legs and arms for reference later.
I use the pull tool in Argile and the smoothing tool more than any other tool to get my desired effect.
The eyelids are raised and the mouth is pulled out more and the mouth socket is pushed in.
I also pull out on the areas where I plan to add legs and arms for reference later.
- Attachments
-
..
-
jeffroig
- Chief Warrant Officer
- Posts: 662
- Joined: 22 May 2009, 10:49
- Type the number ten into the box: 0
Re: Character Modeling
I am now ready to model the arms and legs.
My arms and legs are designed from simple objects spheres to be honest.
I place them end to end and overlap them until I get the desired size.
Once I am satisfied I then use the Boolean function and join them together.
My arms and legs are designed from simple objects spheres to be honest.
I place them end to end and overlap them until I get the desired size.
Once I am satisfied I then use the Boolean function and join them together.
- Attachments
-

..
-
jeffroig
- Chief Warrant Officer
- Posts: 662
- Joined: 22 May 2009, 10:49
- Type the number ten into the box: 0
Re: Character Modeling
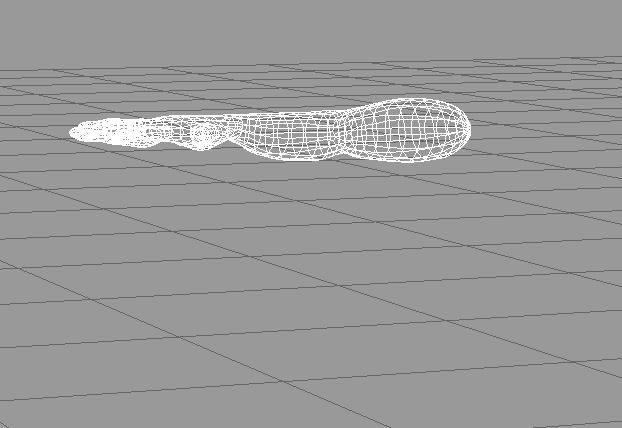
The arm is now exported out as a OBJ and imported into Argile.
I use the smooth tool on the seams where each sphere is joined to smooth the joints out and sculpt the arms to give them the look of a arm and sculpt the fingers to show knuckles.
I use the smooth tool on the seams where each sphere is joined to smooth the joints out and sculpt the arms to give them the look of a arm and sculpt the fingers to show knuckles.
- Attachments
-
..
-
jeffroig
- Chief Warrant Officer
- Posts: 662
- Joined: 22 May 2009, 10:49
- Type the number ten into the box: 0
Re: Character Modeling
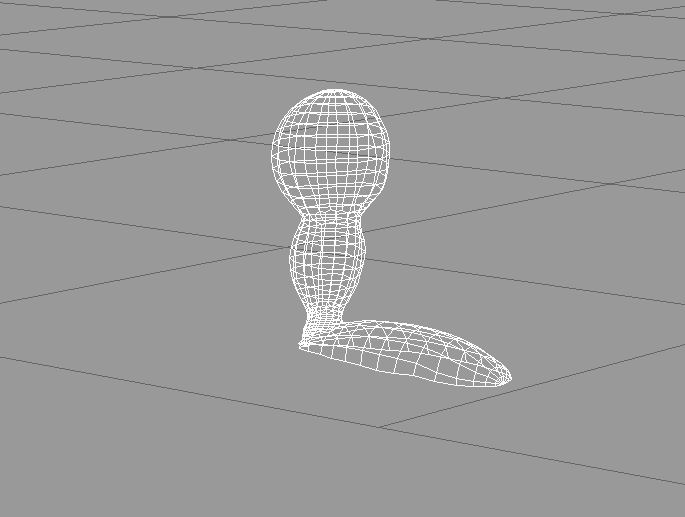
The leg is next and the same process is done on the leg as was on the arm.
- Attachments
-
-

..
-
jeffroig
- Chief Warrant Officer
- Posts: 662
- Joined: 22 May 2009, 10:49
- Type the number ten into the box: 0
Re: Character Modeling
Next the arms are attached to the body by using the Boolean function.
After attaching the arms the object is then exported out as a OBJ and imported in Argile.
Once again the smooth tool is used on the area where the arms are attached to the body to smooth it out.
The move tool is used to sculpt and give the look of shoulders.
After attaching the arms the object is then exported out as a OBJ and imported in Argile.
Once again the smooth tool is used on the area where the arms are attached to the body to smooth it out.
The move tool is used to sculpt and give the look of shoulders.
- Attachments
-

..
-
jeffroig
- Chief Warrant Officer
- Posts: 662
- Joined: 22 May 2009, 10:49
- Type the number ten into the box: 0
Re: Character Modeling
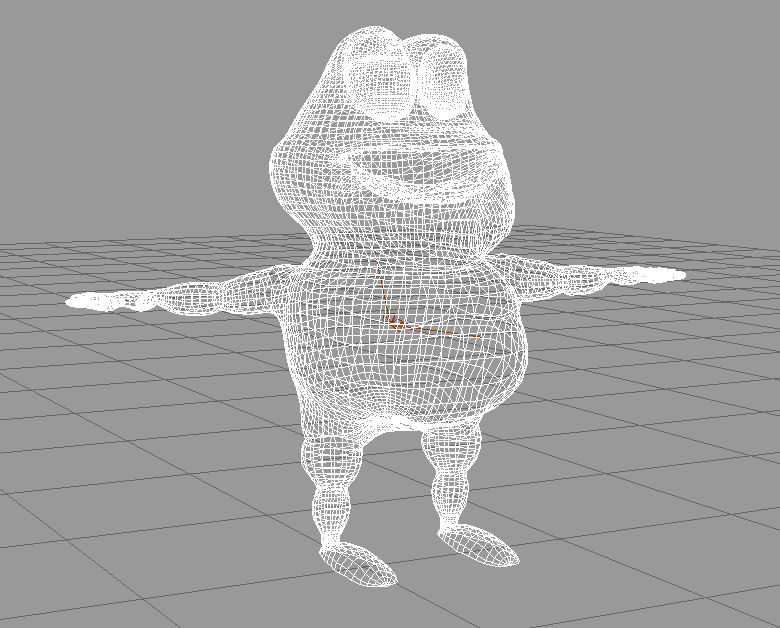
Now it is time to attach our legs to our body.
So the Boolean function is used again to do this.
The object is again exported out to Argile.
The smooth tool is used to fix the seams where the legs attach to the body and the move tool is used to pull out the hips and sculpt the thigh and shin.
So the Boolean function is used again to do this.
The object is again exported out to Argile.
The smooth tool is used to fix the seams where the legs attach to the body and the move tool is used to pull out the hips and sculpt the thigh and shin.
- Attachments
-
..
-
jeffroig
- Chief Warrant Officer
- Posts: 662
- Joined: 22 May 2009, 10:49
- Type the number ten into the box: 0
Re: Character Modeling
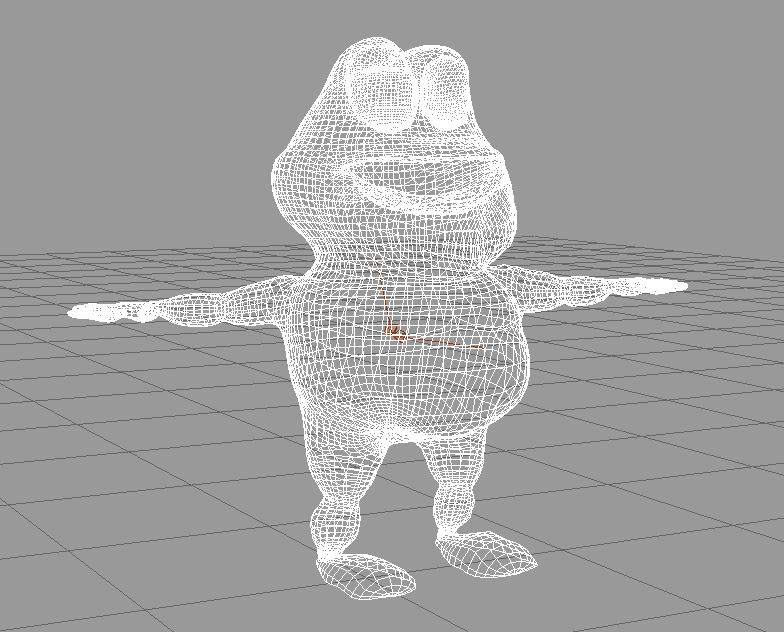
Now it is time to sculpt the feed to give them a bigger base.
We will not be doing toes in this tutorial as this character will be wearing shoes when it is completely finished.
We will not be doing toes in this tutorial as this character will be wearing shoes when it is completely finished.
- Attachments
-
..
-
jeffroig
- Chief Warrant Officer
- Posts: 662
- Joined: 22 May 2009, 10:49
- Type the number ten into the box: 0
Re: Character Modeling
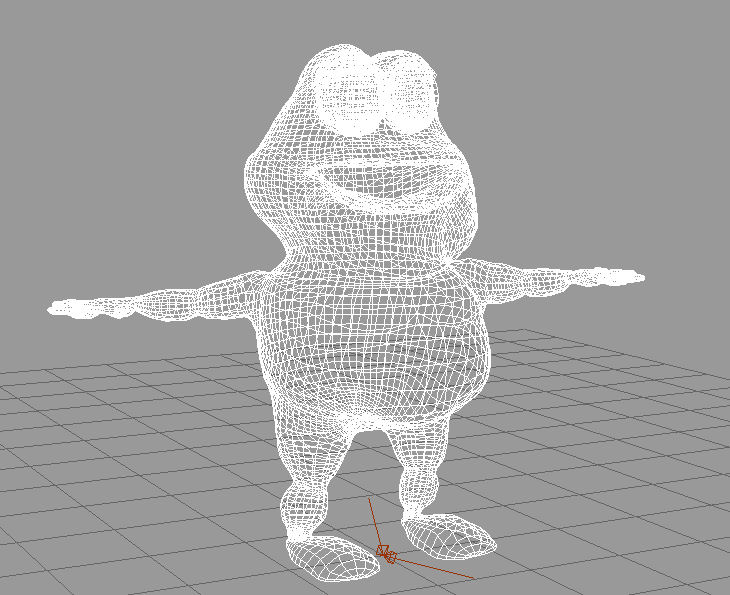
Lets add some eyes and eye lids and then move on to the texturing.
- Attachments
-
..
-
jeffroig
- Chief Warrant Officer
- Posts: 662
- Joined: 22 May 2009, 10:49
- Type the number ten into the box: 0
Re: Character Modeling
And here is our finished character, ready for clothing and ready to be rigged.
- Attachments
-

..
-
Draise

- Captain
- Posts: 3200
- Joined: 21 Sep 2009, 19:33
- Type the number ten into the box: 0
- Location: Bogota, Colombia
Re: Character Modeling
lol! good frog! very cool! love the bulbous eyes! so next step is the rigging right?
-
jeffroig
- Chief Warrant Officer
- Posts: 662
- Joined: 22 May 2009, 10:49
- Type the number ten into the box: 0
Re: Character Modeling
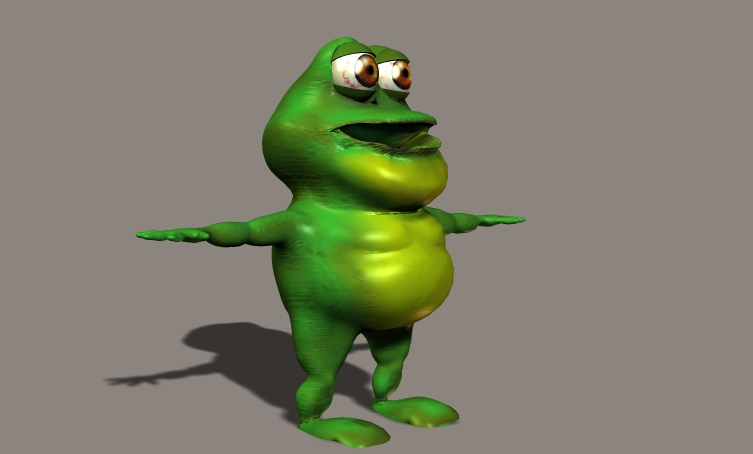
Right you are Driase.
I used the bump tool in Argile to give a little more appeal to the character.
I used the bump tool in Argile to give a little more appeal to the character.
- Attachments
-
..
-
Steinie

- Captain
- Posts: 2958
- Joined: 21 May 2009, 17:38
- Type the number ten into the box: 10
Re: Character Modeling
Jeff,
Thanks for the tutorial.
I have a question. What do you do with the extra polys when you join the limbs to the body? Do you delete them or leave them alone? Will they interferer with muscle/bone influence or create a problem while animating if they are left alone?
Thanks for the tutorial.
I have a question. What do you do with the extra polys when you join the limbs to the body? Do you delete them or leave them alone? Will they interferer with muscle/bone influence or create a problem while animating if they are left alone?
-
jeffroig
- Chief Warrant Officer
- Posts: 662
- Joined: 22 May 2009, 10:49
- Type the number ten into the box: 0
Re: Character Modeling
Steinie,
I am not sure what you mean about extra polygons.
Here is a step by step of the object union of what I see.
Please let me know in which area there are extra polygons.
I am not sure what you mean about extra polygons.
Here is a step by step of the object union of what I see.
Please let me know in which area there are extra polygons.
..
-
jeffroig
- Chief Warrant Officer
- Posts: 662
- Joined: 22 May 2009, 10:49
- Type the number ten into the box: 0
Re: Character Modeling
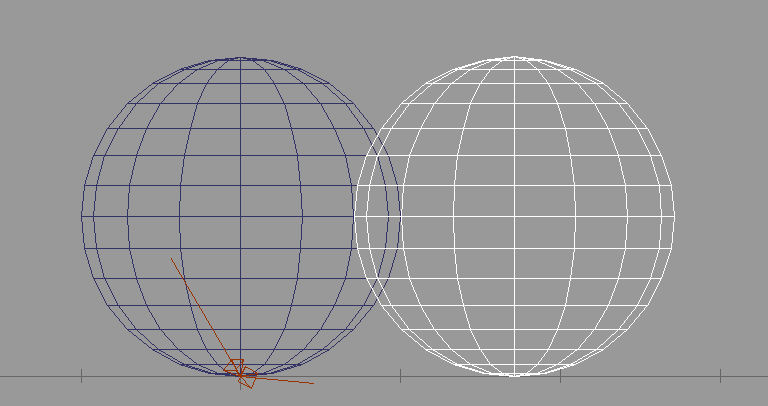
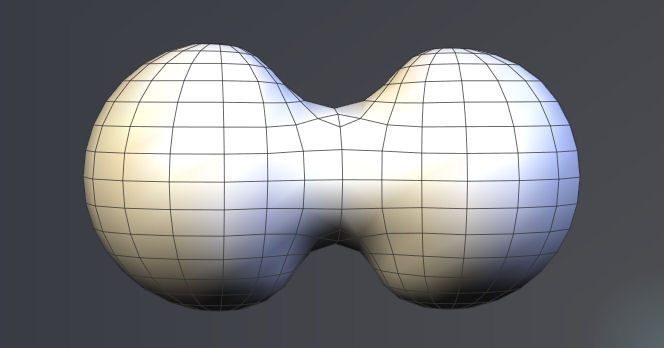
Here is the Object union process .
Lets take two spheres and place them side by side with a small amount of the overlapping.
This can simulate the joining of leg parts or arm parts.
Lets take two spheres and place them side by side with a small amount of the overlapping.
This can simulate the joining of leg parts or arm parts.
- Attachments
-
..
-
jeffroig
- Chief Warrant Officer
- Posts: 662
- Joined: 22 May 2009, 10:49
- Type the number ten into the box: 0
Re: Character Modeling
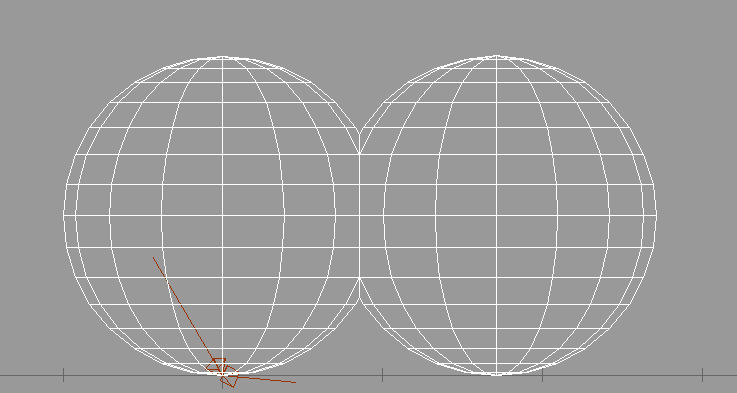
Next we will use the object union tool to join the two into one object.
- Attachments
-
..
-
jeffroig
- Chief Warrant Officer
- Posts: 662
- Joined: 22 May 2009, 10:49
- Type the number ten into the box: 0
Re: Character Modeling
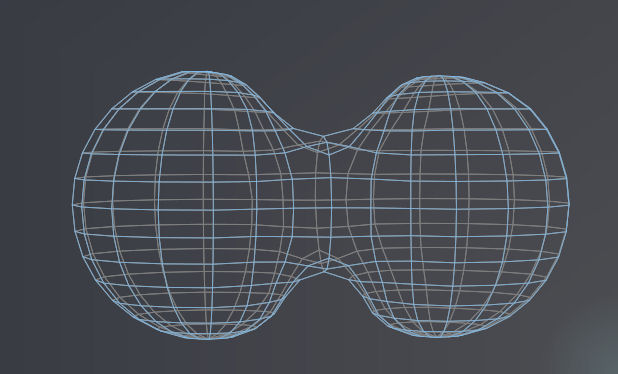
Now the new model is exported out as a OBJ and then imported into Argile.
Once in Argile I use the smooth tool to blend the two pieces and all for better sculpting.
Once in Argile I use the smooth tool to blend the two pieces and all for better sculpting.
- Attachments
-
..
-
jeffroig
- Chief Warrant Officer
- Posts: 662
- Joined: 22 May 2009, 10:49
- Type the number ten into the box: 0
Re: Character Modeling
Here is a view of the object with a texture applied.
- Attachments
-
..
-
Dragneye

- Lieutenant
- Posts: 906
- Joined: 02 Sep 2009, 22:09
Re: Character Modeling
Nice work jeffroig. Cute frog.
ANd thanx for making the tutorial
ANd thanx for making the tutorial
-
jeffroig
- Chief Warrant Officer
- Posts: 662
- Joined: 22 May 2009, 10:49
- Type the number ten into the box: 0
Re: Character Modeling
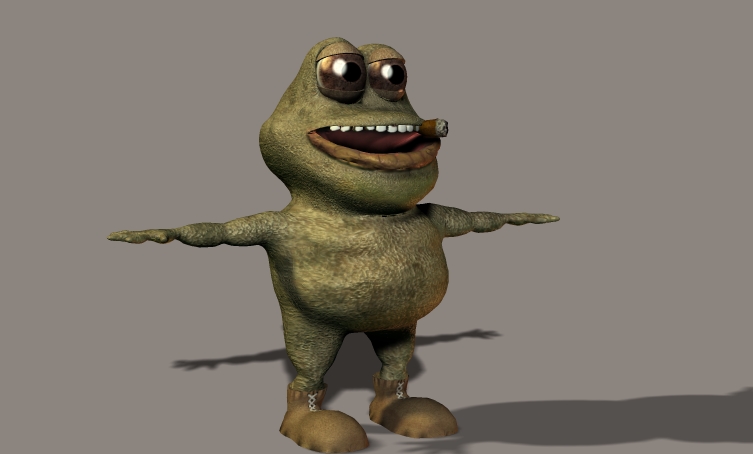
Here is the finished product.
- Attachments
-
-

..
-
Draise
- Captain
- Posts: 3200
- Joined: 21 Sep 2009, 19:33
- Type the number ten into the box: 0
- Location: Bogota, Colombia
Re: Character Modeling
This is funky! Loving the lip textures and personality. Where are you doing these textures? And UV's?
-
pugman 1
- Captain
- Posts: 1555
- Joined: 21 May 2009, 19:26
- Type the number ten into the box: 0
- Location: Germany
Re: Character Modeling
Yep he´s one cool dude 
-
froo
- Captain
- Posts: 2554
- Joined: 22 May 2009, 12:13
Re: Character Modeling
Very nice Jeff! Love it! 
-
jeffroig
- Chief Warrant Officer
- Posts: 662
- Joined: 22 May 2009, 10:49
- Type the number ten into the box: 0
Re: Character Modeling
The UV's and Textures were done in Argile.
..
-
jeffroig
- Chief Warrant Officer
- Posts: 662
- Joined: 22 May 2009, 10:49
- Type the number ten into the box: 0
Re: Character Modeling
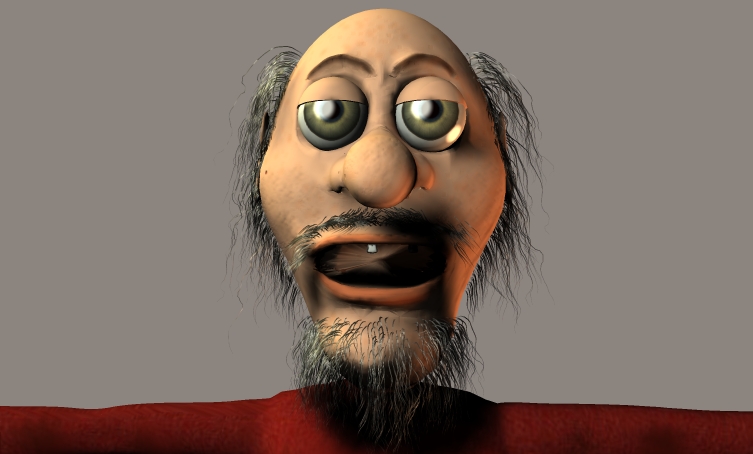
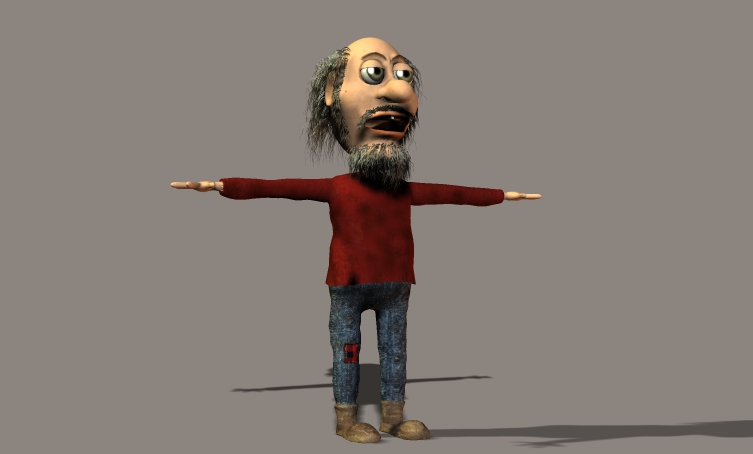
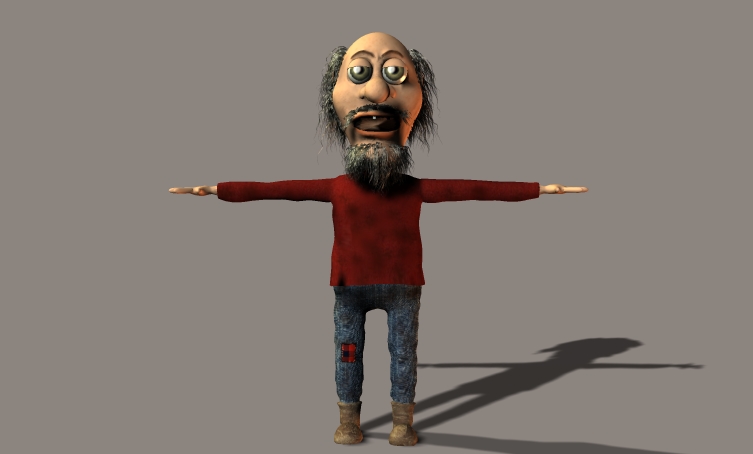
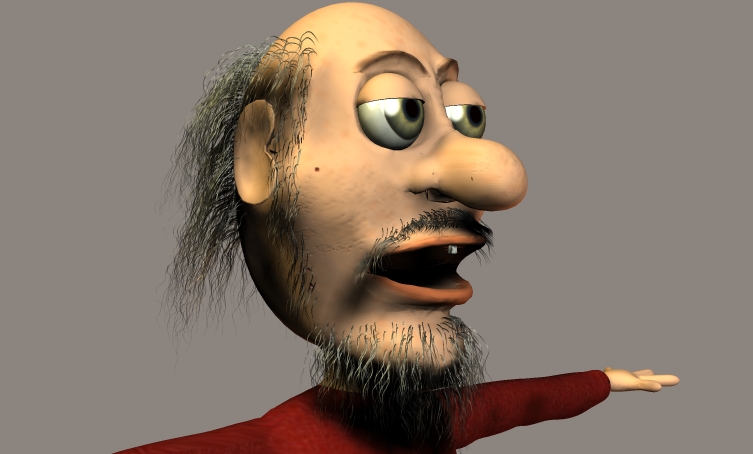
Here are images of a new character created "Hillbilly Earl"
- Attachments
-
-
-
..
-
jeffroig
- Chief Warrant Officer
- Posts: 662
- Joined: 22 May 2009, 10:49
- Type the number ten into the box: 0
Re: Character Modeling
And one last one.
- Attachments
-
..
-
jeffroig
- Chief Warrant Officer
- Posts: 662
- Joined: 22 May 2009, 10:49
- Type the number ten into the box: 0
Re: Character Modeling
I have also put together and more defined set of instructions for creating characters.
While this next set does not have images at the current moment the instructions are pretty simple and should be easy to follow.
For this section of the tutorial we are going only deal with making the head as the rest of the body parts can be created in the same fashion and then joined.
1) Have an idea or image of what you want you character to look like.
2) Open up TS (I use 4.3)
3) Create a sphere
4) Switch to the front view and size the sphere to match what you have as a idea or image of the character.
5) Switch to side view and once again size the sphere.
6) While in the side view rotate the sphere so that the sphere is laying on its back (Z axis is parallel to the ground plane).
7) Switch to the top view, from this view we will be doing most of our work.
8) In vision where the mouth is going to be.
9) use the polygon draw tool and sketch the mouth opening
10) Now use the polygon draw tool to draw another polygon around the once you just drew, and repeat this step once more.
11) It will resemble a bulls eye when done.
12) I do about four rings, this allows for the mouth opening and being able to later sculpt the lips.
14) Now use the polygon draw tool and connect the rings together so that it looks something like a spider web, DO NOT go past the first ring you drew. Leave the center alone so that all you see is just the original vertices that you started with.
13) Now using the point edit tool and selecting edges do the following, select one at a time a vertices that goes from one edge of the first ring to the other edge of the first ring then delete it.
14) What you are doing it creating a open hole for the mouth.
15) Now using the point edit and selecting faces, select the mouth opening. You should have a oval or circle selected.
16) Switch to the side view, using the point edit tool pull down on the face you selected, pull it towards the back side of the head or towards the ground. Do not pull it all the way down only pull it about half way.
17) Switch back to the top view and use the point scale tool to enlarge the opening up and down and left to right.
18) You have just created the mouth.
19 The same process can be done to create the eye sockets with the exception that you only need two to three rings and the most.
19) If you plan on creating eye brows that stick out then use the polygon draw tool to draw a half ring above the eye, you will need to create one below the original one and one above the original one, connect them together just like you did your mouth.
20) At this point you will need Argile to perform the remaining steps.
21) Export your object from TS in OBJ format to a folder.
22) Open up Argile and import your object into it.
23) By default when you import a object into Argile it is in stage "0" of the mesh generation, select stage "1" but DO NOT select or click on Generate Mesh.
24) You can now start sculpting, I use the move tool and jelly smooth the most.
25) Once you have got your model to the way you like it, go back and select "0" on the mesh generation and this is what your model really looks like.
26) Now export the model out as a OBJ, every time I make a change I number it so I may end up with 20 or more head models before I am done.
27) Open up TS and import your head back in.
28) Create a sphere and scale down to fit your head as a nose, one you have it looking good use the Object Union tool to join it to your head.
29) Now export it back to Argile as a OBJ.
30) Once again import it into Argile and start sculpting until you get it looking the way you want, using the same steps as above.
Follow these steps for the whole character and I am sure you will end up with some interesting end results that you will like.
Take care and keep on modeling...
While this next set does not have images at the current moment the instructions are pretty simple and should be easy to follow.
For this section of the tutorial we are going only deal with making the head as the rest of the body parts can be created in the same fashion and then joined.
1) Have an idea or image of what you want you character to look like.
2) Open up TS (I use 4.3)
3) Create a sphere
4) Switch to the front view and size the sphere to match what you have as a idea or image of the character.
5) Switch to side view and once again size the sphere.
6) While in the side view rotate the sphere so that the sphere is laying on its back (Z axis is parallel to the ground plane).
7) Switch to the top view, from this view we will be doing most of our work.
8) In vision where the mouth is going to be.
9) use the polygon draw tool and sketch the mouth opening
10) Now use the polygon draw tool to draw another polygon around the once you just drew, and repeat this step once more.
11) It will resemble a bulls eye when done.
12) I do about four rings, this allows for the mouth opening and being able to later sculpt the lips.
14) Now use the polygon draw tool and connect the rings together so that it looks something like a spider web, DO NOT go past the first ring you drew. Leave the center alone so that all you see is just the original vertices that you started with.
13) Now using the point edit tool and selecting edges do the following, select one at a time a vertices that goes from one edge of the first ring to the other edge of the first ring then delete it.
14) What you are doing it creating a open hole for the mouth.
15) Now using the point edit and selecting faces, select the mouth opening. You should have a oval or circle selected.
16) Switch to the side view, using the point edit tool pull down on the face you selected, pull it towards the back side of the head or towards the ground. Do not pull it all the way down only pull it about half way.
17) Switch back to the top view and use the point scale tool to enlarge the opening up and down and left to right.
18) You have just created the mouth.
19 The same process can be done to create the eye sockets with the exception that you only need two to three rings and the most.
19) If you plan on creating eye brows that stick out then use the polygon draw tool to draw a half ring above the eye, you will need to create one below the original one and one above the original one, connect them together just like you did your mouth.
20) At this point you will need Argile to perform the remaining steps.
21) Export your object from TS in OBJ format to a folder.
22) Open up Argile and import your object into it.
23) By default when you import a object into Argile it is in stage "0" of the mesh generation, select stage "1" but DO NOT select or click on Generate Mesh.
24) You can now start sculpting, I use the move tool and jelly smooth the most.
25) Once you have got your model to the way you like it, go back and select "0" on the mesh generation and this is what your model really looks like.
26) Now export the model out as a OBJ, every time I make a change I number it so I may end up with 20 or more head models before I am done.
27) Open up TS and import your head back in.
28) Create a sphere and scale down to fit your head as a nose, one you have it looking good use the Object Union tool to join it to your head.
29) Now export it back to Argile as a OBJ.
30) Once again import it into Argile and start sculpting until you get it looking the way you want, using the same steps as above.
Follow these steps for the whole character and I am sure you will end up with some interesting end results that you will like.
Take care and keep on modeling...
..
-
froo
- Captain
- Posts: 2554
- Joined: 22 May 2009, 12:13
Re: Character Modeling
How'd you do the hair jeff?
-
jeffroig
- Chief Warrant Officer
- Posts: 662
- Joined: 22 May 2009, 10:49
- Type the number ten into the box: 0
Re: Character Modeling
froo the hair was done in Poser.
..