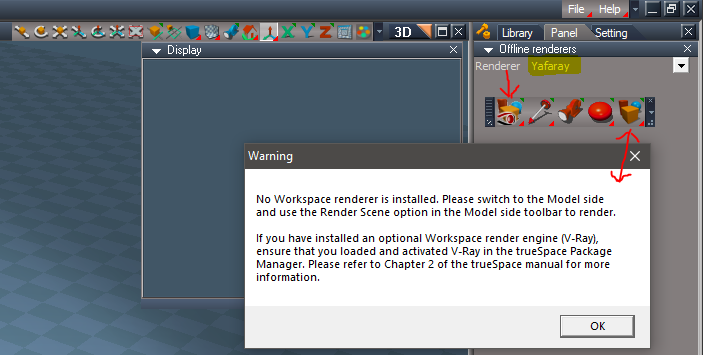
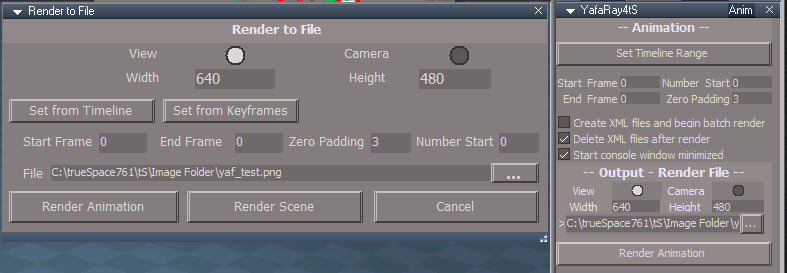
Great! Looks like you got it sorted out.
I am trying to update the YafaRay4tS Installer's ReadMe.txt
Please verify that this is correct and if you have any other suggestions.
Add to the Developer's notes?
Is the Blender instructions correct?
YafaRay4tSv090 was created to work in trueSpace7.61 'Workspace'
It does not work in trueSpace7.61 'Model'
Tested with YafaRay v3.3.0
YafaRay Installation
1.) Install the YafaRay v3.3.0 render engine from one of these sites:
https://github.com/YafaRay/Blender-Exporter/releases
https://github.com/YafaRay/Core/releases
Unzip the file and copy the 'yafaray_v3' folder to Program Files
Example: C:\Program Files\yafaray_v3
//////////////////////////////////////////////////////////////////////////////////////////////////////////////////
YafaRay4tS Installation
Next if you have previously installed YafaRay4tS before, Uninstall YafaRay4tS from the Add & Remove program in the Windows Control Panel first!
2.) Extract All the files from the YafaRay4tSv090.zip. into a folder named YafaRay4tSv090
Example: C:\trueSpace761\YafaRay4tSv090
3.) Open trueSpace7.61 and from the Workspace's File menu, Load the YafaRay4tS_Installer.RsObj from where you extracted the files.
WARNING: Do not Drag and Drop, use the File menu!
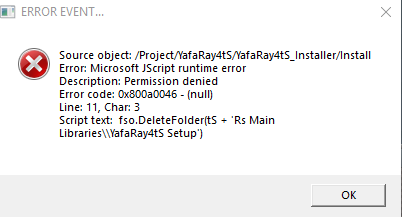
4.) From the YafaRay4tS Installer panel select the 'Install' button.
You should see a tS761 Question message asking:
"Your existing YafaRay4tS Libraries will be deleted and replaced with updated versions."
"Would you like to continue?"
If not select your keyboard keys Alt + Tab to bring the message forward. Selecting "Yes" will start the installation and selecting "No" will Cancel the installation.
WARNING: If you have any content saved in any of these three libraries, they will be deleted, so save anything you want into a different library.
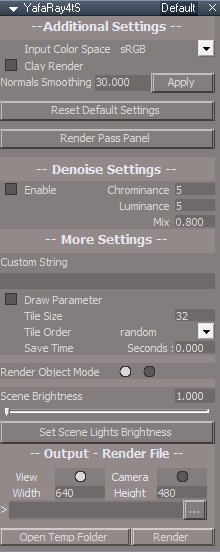
5.) From Workspace in the Stack/Panel - YafaRay4tS/Setup aspect
Set the 'YafaRay Installation Path' to the yafaray-xml.exe file where you have installed YafaRay v3.3.0.
Example: C:\Program Files\yafaray_v3\bin\yafaray-xml.exe
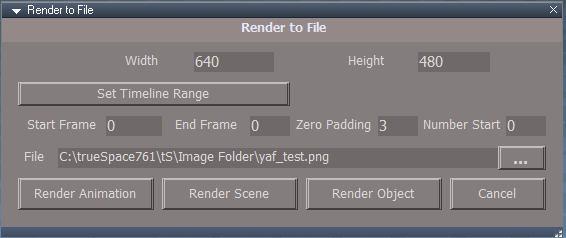
6.) Set the 'Output - Render File' to where you want to render an image or images.
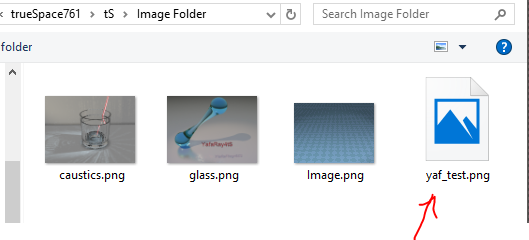
Example: C:\Temp\yaf_test.png
7.) Select the 'Save Settings' button to save your directories into the default YafaRay4tS object.
8.) Position the YafaRay4tS toolbar and save your Layout.
9.) From Workspace in the Package Manager, Install and Load the Clintons3dPlugin, and Reboot trueSpace7.61.
Congratulations you've finished your YafaRay4tS setup!
//////////////////////////////////////////////////////////////////////////////////////////////////////////////////
YafaRay4tS Uninstall
1.) Open trueSpace7.61 and from the Workspace's File menu, Load the YafaRay4tS_Installer.RsObj from where you extracted the YafaRay4tSv090 files
2.) Select the 'Uninstall' button.
You should see a tS761 Question message asking:
"Your existing YafaRay4tS Libraries will be deleted."
"Would you like to continue?"
If not Select your keyboard keys Alt + Tab to bring the message forward. Selecting "Yes" will Uninstall the installation and selecting "No" will Cancel the installation.
WARNING: If you have any content saved in any of these three libraries, they will be deleted, so save anything you want into a different library.
//////////////////////////////////////////////////////////////////////////////////////////////////////////////////
Developer notes:
If you Reset the Default Context in trueSpace761 you will have to install YafaRay4tS again.
The 'Update YafaRay Render Node' script found in the 'YafaRay4tS Setup' library can be used to update an existing scene. It will not update the materials.
YafaRay scenes for trueSpace7.61
http://clintons3d.com/plugins/truespace ... faray.html
//////////////////////////////////////////////////////////////////////////////////////////////////////////////////
YafaRay4tSv080
partial save timer - save file while rendering to see progress
Tile rendering options - linear or random for bucket style renders
custom text for the Draw Params option
New material options are at the bottom of the materials
Pass ID is used with the render passes
Visibility can be set to normal, shadow only, no shadows, invisible
Receive Shadows uncheck so material does not get shadows
threads default to -1
Render Passes
Check "enable" to turn on render passes
Use the dropdown to select render passes
RenderPassList.txt contains a list of all possible passes that can be typed into any slot. The channel isn't limited to the dropdown list selections.
The MultiLayer option at the bottom only applies to the exr file format.
YafaRay4tSv075
TrueSpace 7.61 version required and is not backwards compatible.
Improved skeletal meshes/Actors with animation support.
Skeletal meshes and Characters, will export if you apply SDS to the mesh. The first Level of SDS is the preferred method unless the mesh is already subdivided.
Skeletal meshes will also export if you apply a morph to the character. Apply morph then right click to immediately exit the tool.
Support for multiple materials on one mesh.
Fixed mesh normals for better glass objects.
Spotlight and omni light power exports the same as Blender with a export power = power*power/2.
Area and Sphere lights have a render option to make them visible.
Area light has a new mesh so when the mesh is at (0,0,0) the resulting light is also at (0,0,0).
Adjusted light attenuation parameters to make the preview more closely match the render.
Does not lose camera selection if the scene name changes.
Glass material absorption value was not connected so value was never used.
Added a strength control to the glass material to control the D3D transparency preview(no effect on the final render).
Bumpmap preview for materials.
Changed the default render parameters to match Blender's UI values.
YafaRay4tS materials default to the corresponding Blender material default values.
Added a global input gamma that is applied to colors, lights and textures to translate them to linear color space used by YafaRay.
Gamma value does not effect the display in trueSpace 3D viewport.
Added DarkTide's sun sky background option.
Added support for rendering to the OpenEXR file format(exr).
New aspects for each Lighting Method.
YafaRay4tS Settings button shows the YafaRa4tS panel's presently used Lighting Method aspect in the Stack.
YafaRay4tS Export and Render button no longer shows the YafaRa4tS panel in the Stack with the LMB.
YafaRay4tS Export and Render button shows the YafaRa4tS panel's presently used Lighting Method aspect in the Stack with the RMB.
Diffuse Reflect Map fixed in new improved Yaf Coated Glossy and Yaf Glossy materials.
New improved YafaRay4tS Spot light with Hotspot generator.
Updated YafaRay4tS Help file.
New tS7.61 YafaRay4tS Installer script.
Yafaray 0.1.2 Beta support:
Requires Yafaray version 0.1.2 beta to be setup with YafaRay4tSv0.7.5 and the Yafaray 0.1.2 xml format - beta checkbox enabled, located in the Setup aspect. Only one version of Yafaray can be installed at one time.
New file formats hdr, jpg, png and tif.
Save Alpha located in the Lighting Method aspects. - Exports an alpha file in addition to the rgb output file.
Z - Channel option works.
New Volume Region mesh: Uniform and Height Fog work with the YafarayVolume.RsObj
Support for normalmap textures.
Rough Glass material.
Photon only and soft shadow parameters for the Spot light.
IES Light with preview.
SPPM lighting method(not working at this time for the xml renderer, YafaRay version 0.1.2-Beta2).
//////////////////////////////////////////////////////////////////////////////////////////////////////////////////
YafaRay4tSv070
Hair takes on the same Material as the base mesh it grows from.
There are 2 options for preparing an Character or a Skeletal mesh for rendering with Yafaray:
1. Apply a Morph then right click to immediately exit the tool.
2. Apply SDS to the mesh. The first SDS (Level 1) is the preferred method unless the mesh is already subdivided.
The material texture map X Scale and Y Scale only works well for odd whole number values.
//////////////////////////////////////////////////////////////////////////////////////////////////////////////////
Blender:
1.) To install for Blender copy the "yafaray" folder into the AddOns folder inside blender
2.) Start Blender
3.) File > User Preferences
4.) Add-ons
5.) find and activate yafaray via checkbox
6.) press the Save User Settings button









 DRY
DRY